Authored by helmi
 Getting started with your Pi
Note: This guide assumes a cursory knowledge of Linux.
A Raspberry Pi is a miniature, single-board computer orginally developed as a means to encourage programming and computer science education. Owing to it’s small size, price and great feature set, adding a Raspberry Pi to your Marty can greatly expand your robot’s capabilities. Effectively, your Marty becomes a full fledged computer, and this boost in computing power can be leveraged to let your Marty do some pretty advanced things. Take a look at the amazing Robot Operating System (ROS) and some of our work using it, such as gamepad control, face, eyes and smile tracking using a camera, and even robot football.
Flashing a Pi image
We have a pre-built image for a RaspberryPi available with ROS and a bunch of other programming tools already installed to use with Marty. You can download it here:
For information on how to flash an image onto an SD card, the official RaspberryPi install instructions cover the topic well.
Note that these are images that we’v made a bunch of changes to, so they might be a bit behind on the most recent updates. There are also some configuration differences, for instance, bluetooth is disabled as unfortunately using it and the UART/Serial on the Pi at the same time results in glitchy, poor performance.
Configuring a Pi from scratch
If you don’t want to use our official Raspbian image, then it is possible to get up and running from scratch, though this is only advisable if you are an experienced user.
A step-by-step breakdown of this is outwith the scope of this getting started guide, though the individual steps are well documented elsewhere on the web.
Main required components:
- Install the latest version of Raspbian Jessie.
- Install ROS. Currently only Indigo is officially supported, your mileage with other ROS distros may vary.
- Install Marty specific dependencies on to your Pi
Installing a Raspberry Pi in Marty’s Head
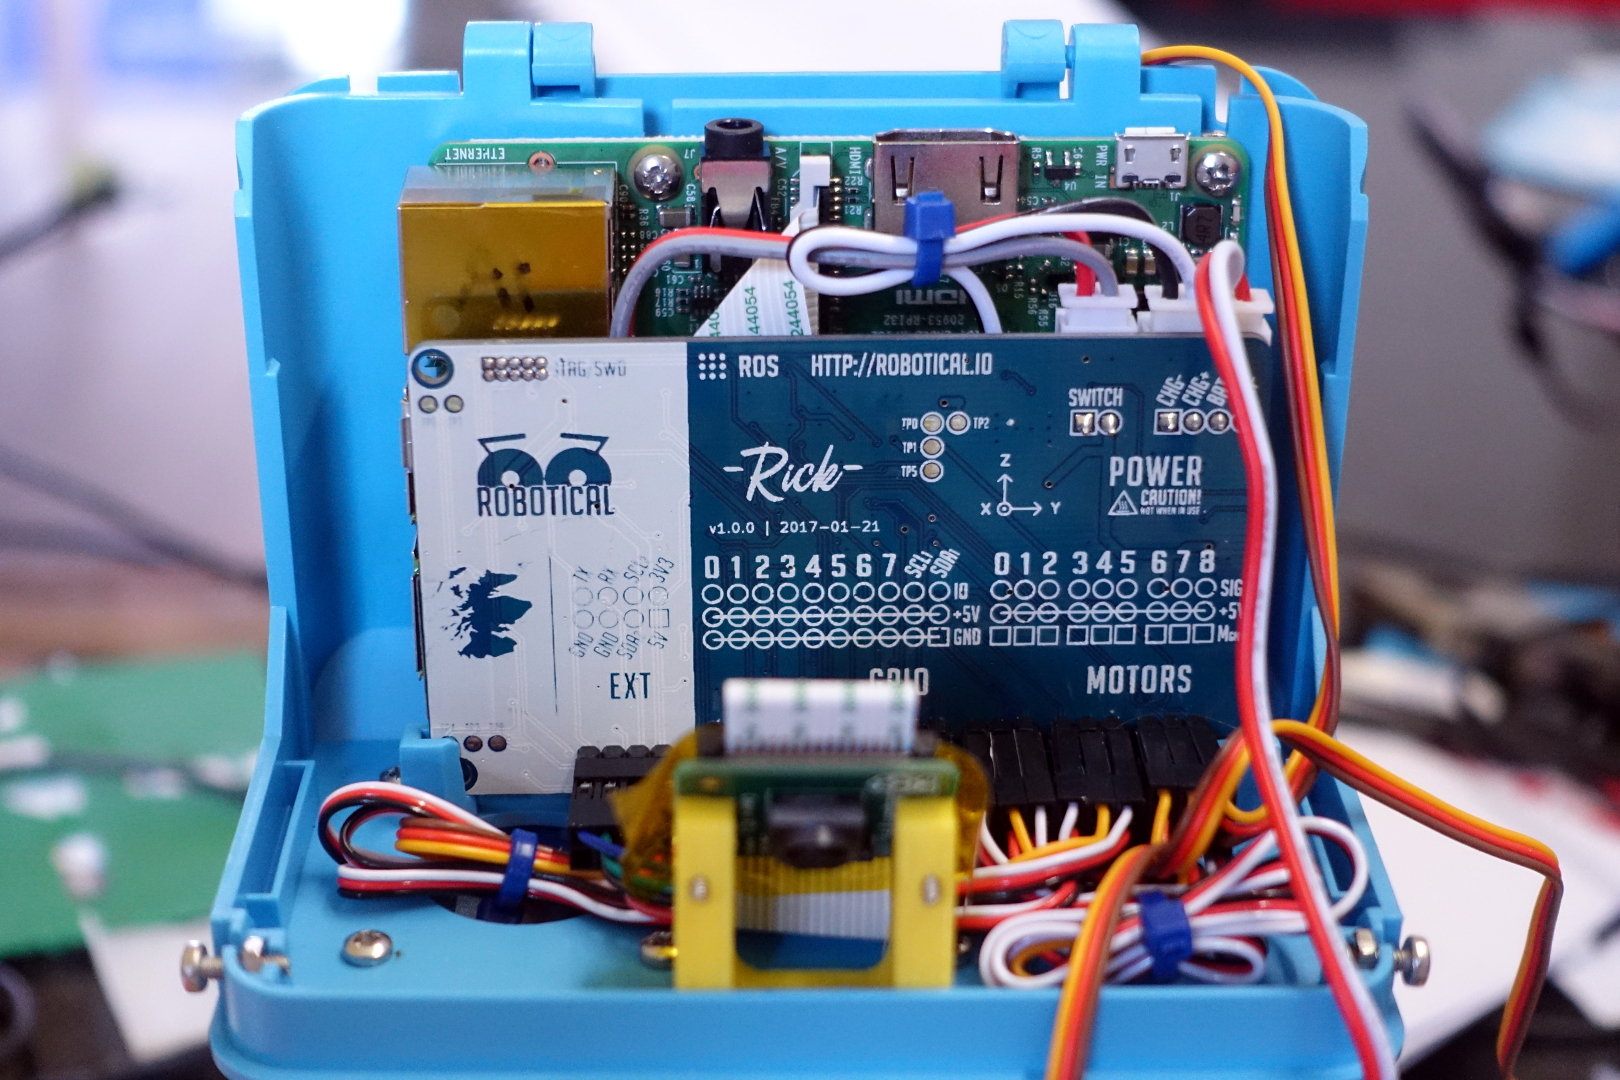
Marty’s head has mounting holes and a slot behind Rick designed to accomodate a Raspberry Pi (Pi 2, Pi 3 or Zero). You can use two space M2.5 machine screws and nuts to affix the Pi.
If you’ve got access to a 3D printer, we also have a mount designed for the Raspberry Pi Camera to poke through the mouth. Carefully tuck and fold the Pi camera cable under Rick to connect it.
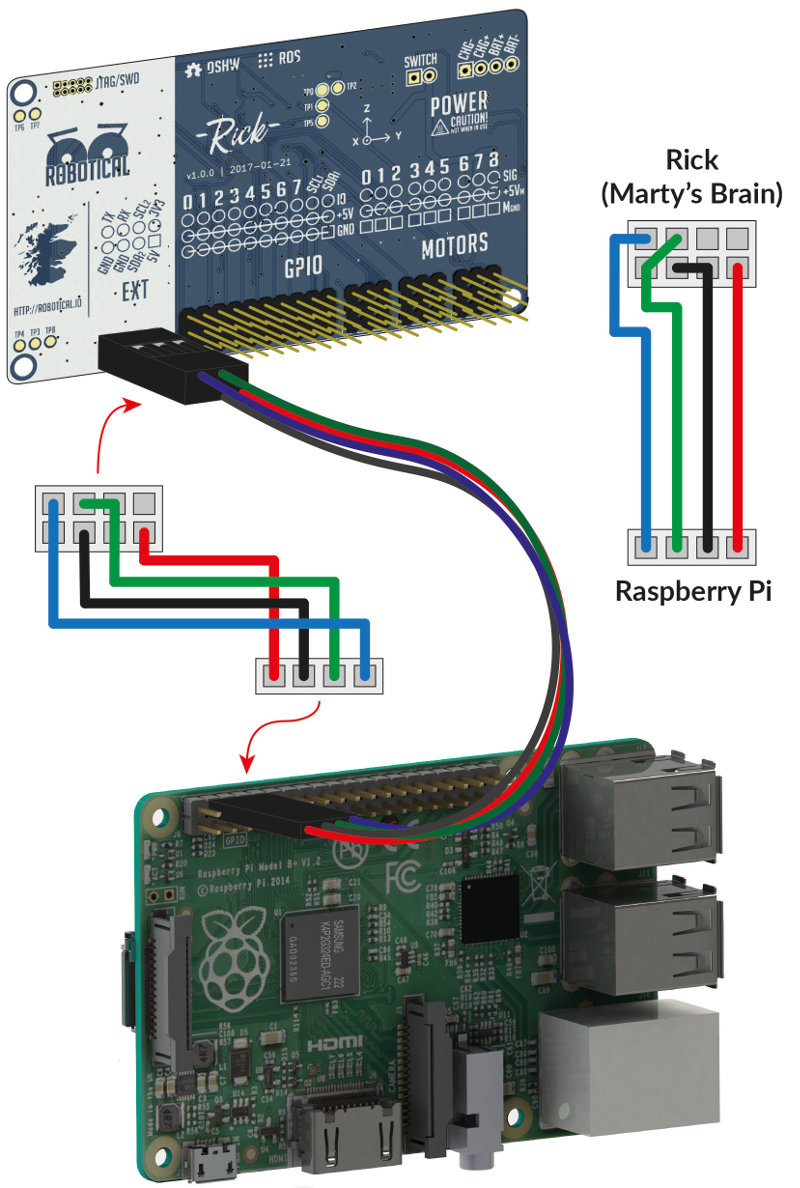
Check Figure 1 above for how to connect a Pi to Rick, this will also power the Pi so you don’t need a Micro USB cable as well! Be careful to insulate the top of the ethernet port on the Pi, using electrical tape or something similar, as ther small JTAG pin header on Rick can short out on it if they touch.
Because the Raspberry Pi is now also being powered, your Marty’s battery life will be shorter - you can upgrade the battery to a bigger capacity one, which you can find on RC Aircraft & Hobby sites. Just be careful to check the specs to ensure any different battery won’t be dangerous and damage your Marty. Depending on the type of battery you select, you might also need an external charger, and it might also be unsafe to use Rick’s built-in charger.